I have explained how to take a screenshot on Windows, and this article will explain how to take a screenshot on macOS. This guide also works for Macs with the new Apple Silicone Chip running the latest macOS. Apple makes it super convenient to take a full screenshot, a specific area, or a single window in every version of macOS or previous Mac OS X. Unlike Windows, you do not have to run a snipping tool for better control of screenshots. You just need the three-key combination to get any screenshot you need.
How to take a full screenshot in macOS
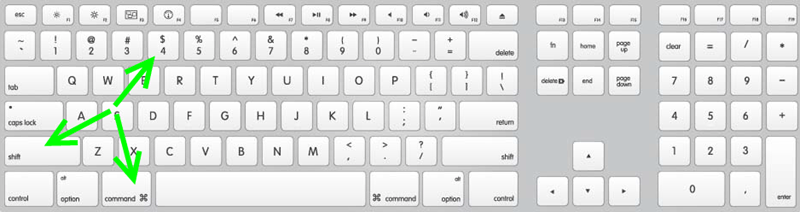
Press Command + Shift + 3 and release them to get a full screenshot that shows your entire desktop.
You don’t have to go Paint and paste the screenshot there as you do in Windows. macOS automatically save your screenshots to the Desktop in PNG in Mac OS X 10.4 and later.

Tips:
- Remember to open the program you want to show in your screenshots before taking one.
- What if I don’t like the screenshot to be saved? I want it in the clipboard. Well, just hold Control along with Command + Shift + 3. You can then paste it to any place where it accepts image files in the clipboard, including emails and office programs.
How to take a screenshot of any area in Mac
In this case, the key combination to take a screenshot on Mac is Command + Shift + 4, hold them, and then release them. Drag the cursor to take a screenshot of any area you want when you notice the mouse cursor turns into crosshairs. Release the mouse, and the screenshot will be saved to the desktop in PNG by default.
What if I don’t like the screenshot to be saved? I want it in the clipboard. Well, hold Control along with Command + Shift + 4. You can paste it to any place that accepts image files in the clipboard, including emails and office programs.
How to take a screenshot of a single window on macOS
Press Command + Shift + 4 and then release all the keys. Tap the Space button. A single click on the window to confirm and save the screenshot to the Desktop in PNG.
Take Screenshot on Mac in JPG, GIF?
The default screenshot taken on a macOS is PNG. macOS supports JPG, GIF, TIFF, and PDF. If you want to change the formats, you just have to open the Terminal.app in Applications-Utility and enter the below commands; you are free to set it back to PNG.
JPG:
defaults write com.apple.screencapture type jpg;killall SystemUIServer
GIF:
defaults write com.apple.screencapture type gif;killall SystemUIServer
TIFF:
defaults write com.apple.screencapture type tiff;killall SystemUIServer
PDF:
defaults write com.apple.screencapture type PDF;killall SystemUIServer
Back to PNG:
defaults write com.apple.screencapture type png;killall SystemUIServer
Record Screen for better explanation
Screenshots are not always good to go than recordings to better explain yourself. If you find others do not understand you, even with a screenshot, try to record a screen for them. And there’s a freeway on MAC to record the screen with sound using QuickTime.

High Sierra
Screen shot as before but now in order not to have the full window use spacebar to select with cursor.
Your screenshot can not be saved. You do not have permission to save files in the location where screen shots are stored. This is the message I get in High Sierra when trying to take a screenshot.
Hi Gordy,
Would you like to check the below post for troubleshooting?
https://discussions.apple.com/thread/4943093
Yours,
Hunk