I explained how to take screenshots on Windows and macOS to better explain yourself when you have to show someone what you are doing. However, say, if you are a teacher, screen recording, when comparing with screenshots, provides supplemental and remedial materials and instructors can focus on higher-order learning activities during class. There would be many other reasons, situations that you will have to record or capture a screen and Joyoshare Screen Recorder is a simple and easy to use screen recorder and screen capturer that is compatible with the latest operating systems like Windows 10 and macOS Catalina.
Below is Joyoshare Screen Recorder review by MySolutions.Tech and the review are mainly done on the macOS version, which I prefer because it is able to record screen for direct editing by iMovie, Final Cut Pro, etc.
Download and Install
Joyoshare Screen Recorder is available for PC and Mac users and it supports Windows XP and all above versions and Mac OS X 10.8 and above. You are able to visit its official site or download a trial version from the below buttons.
Install Joyoshare Screen Recorder on PC and Mac is the same as we do as installing other programs. On macOS, we just have to drag the icon to the Applications folder and then we can open the program in Applications.
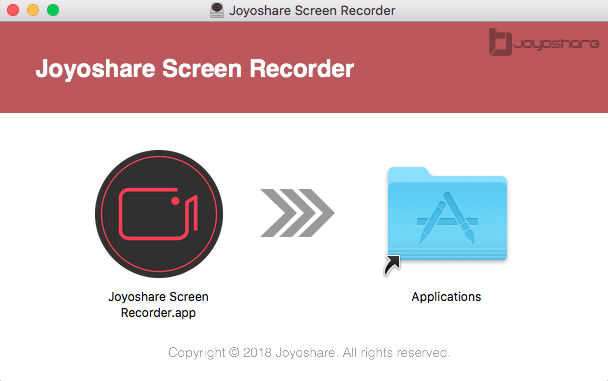
Installing Joyoshare Screen Recorder for Windows is easy as well. We just have to follow its instructions and click the Next button and done.
Besides, the trial version is full-functional. The only limitation is the watermark. Joyoshare will add its logo and website address to the middle of each recording.
Simple and Easy Screen Recorder
Joyoshare Screen Recorder is a screen recorder that enables you to capture video from your computer screen with a very simple design. The UI of Joyoshare Screen Recorder is not complicated and is easy to understand with icons and texts and it is very easy to use. Once you have set the area to record, hit the big red REC button to capture video. While recording the screen, the program also records the system sound or the sound that is being played. You can also record your own sound from microphone.

You are free to record your desktop in full-screen as well as various preset sizes in 16:9 resolutions from 640*360 to 1920*1080 and 4:3 from 640*480 to 1280*960.
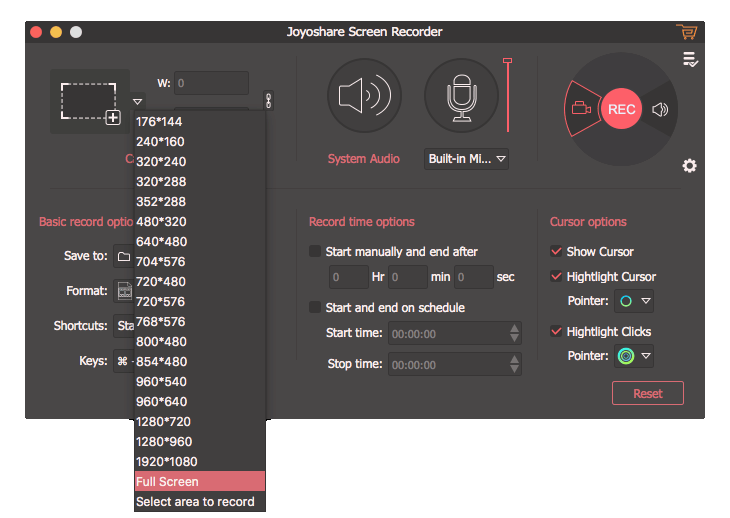
You are also free to drag over an area to record, just unlink the Keep Ratio here:

If you are recording a Window, you can stop the recording at any time manually with the Stop or Pause button. You can resume the recording if you press Pause. Use the Cut button if you want to split the recording.
Record Screen in Any Video Format
There are free programs that are able to record screen, but as far as I can see, they don’t work quite well. One of the main problems is video codec and format for recording. The preset codecs and video formats in one of the free video recorder are AVI in MPEG-1, MPEG-2, Xvid, DivX and MPEG4, FLV, MPEG 4 MP4 and WMV, MPEG 2 VOB and TS and Apple QuickTime MOV. And, if you don’t have any suitable codecs, you will have to find the codec on the internet, install yourself and restart the program to continue. But with Joyoshare Screen Recorder, it’s NOT a problem at all.
If you click on Options-Format, you will see there are a lot presets formats including devices for iPhone/iPad/Apple TV, Xbox, Android phones, tablets and TVs, HD videos for HD MP4, HD M4V, HD AVI, HD MKV, HD WMV HD MOV, HD TS and HD TRP, Web videos for YouTube, Facebook and Vimeo, and general web video formats like FLV, F4V, and general videos including MP4, M4V, MKV, MOV, 4K video, HEVC Video, HEVC MKV, WMV, AVI, MPEG-2, MPEG-1, DivX, DV, DVD-Video, 3GP2, 3GP, WebM, ASF and OGV.
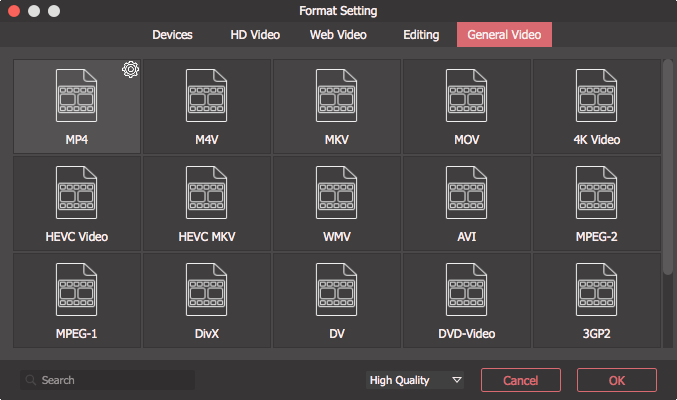
If you are running the macOS version, there are preset formats that are compatible with your editing apps like iMovie, iDVD, iBooks, Final Cut Pro and ProRes.
For complete details on what is supported, you can check it out on its official site here for Windows and here for Mac.
The codec in each format or device is optimized as well. To name but a few, for MP4 video, you are able to record in MPEG-4, H.264, and H.265. For AVI, you are able to record in DivX, XviD, MPEG-4, and H.264.
Rich in Options
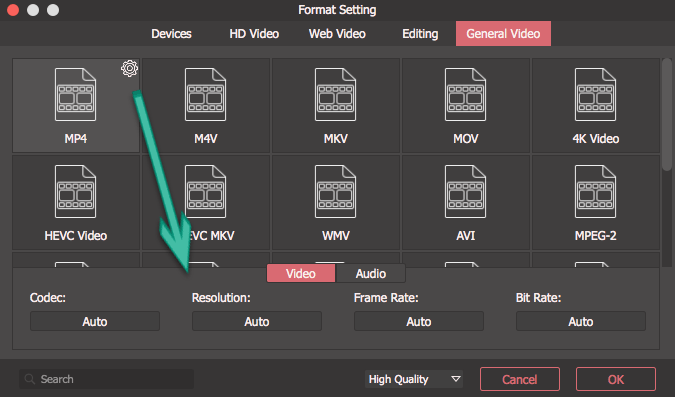
If you move your mouse over each format and click the Gear icon, you are then able to set the codec, resolution, frame rate and bit rate for video and codec, channel, sample rate and bit rate for audio.
For MP4, M4V and MOV, iPhone 7, 7 Plus, iPhone 8,8 Plus and iPhone X, you are able to set the FPS up to 60 and others only go up to 30 ,but I myself suggest you keep it by default, most of which are AUTO, because Joyoshare uses variable FPS to significantly reduce the recorded video size.
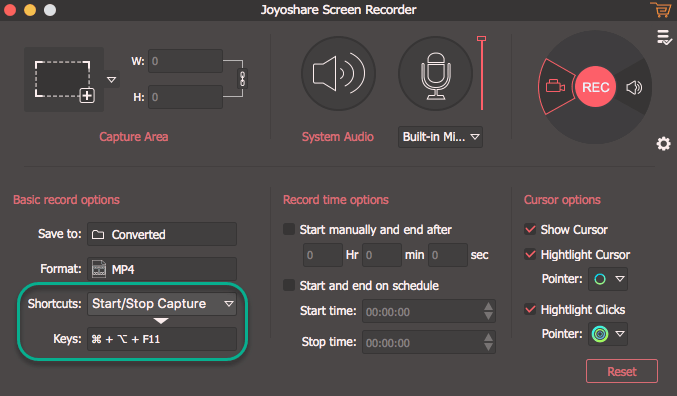
Hotkey settings are very useful as I find the program will hide in the tray when you begin recording in full screen. Hotkey makes it more convenient to show your main video immediately. And you are free to customize your own. Click the drop-down menu here to set each:
Schedule Live Streaming Recording
Joyoshare Screen Recorder is able to record streaming sites like Vimeo, CBS, Dailymotion, Vevo, TED, Netflix, Spotify, Pandora, Tidal, etc. that are not able to download.
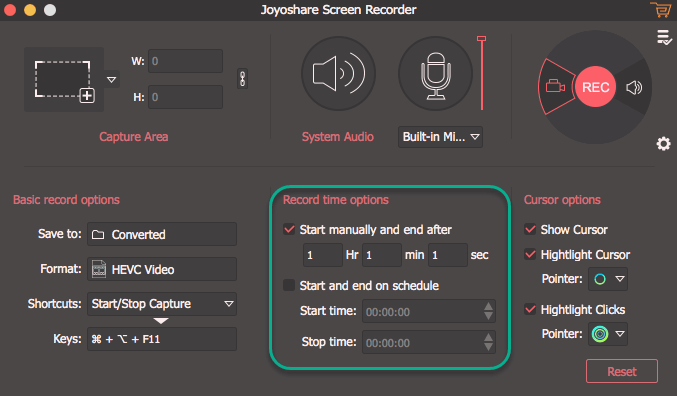
And, the schedule options for recording is really useful because I see it would be a pain if a live streaming starts in the middle night. With Joyoshare Video Recorder’s intimate service to schedule the recording of any live streaming, You will just have to click the Gear icon to expand the options, and there are two ways to schedule recording: Start and end after a period or Start and end according to the time you set.
Pros and Cons
From the above Joyoshare Video Recorder review, we see it’s really easy to use yet powerful video capturing software that is available for both PC and Mac users. And here come the pros and cons of a summary.
Pros:
- Easy to use with simple UI but rich options
- Various preset profiles to record screen directly to devices, web sharing or HDD in HD or SD quality.
- Optimized codec, frame rate, bit rate for video and audio recording
- Small file size but high quality
Cons:
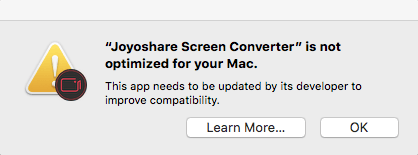
Joyoshare Video Recorder is a 32-bit program. Although it is fully compatible with macOS 10.13 High Sierra and 10.14, you will get the annoying warning from Apple. Hope there will be a 64-bit release soon.

How do you use the Start and End on Schedule? What is the time format you have to enter? I am trying to record a webinar that starts at 3 PM PDT. Would that be 15:00 in Joyoshare? I can’t find instructions for this feature anywhere. Maybe you have used it and know more than is posted on the website. Thanks.
Yes, 15:00 equals to 3 PM.