We have many DVDs, a new model of Apple TV 4K, and a grungy kid, who sometimes screws up my DVDs. Then I decide to look for a DVD ripper that will fully functionally copy my personal DVDs including my copy-protected movies mostly from Disney for kids on HDD. Then I assume we could either take it with us when we travel or airplay the DVD movie for watching from Apple TV. To be able to watch DVDs on Apple TV, I see there are two ways, and I will explain both below. But I prefer to rip DVDs to Apple TV as this will protect the DVDs as well. OK, here we go.
Stream DVD to Apple TV with VLC and AirPlay[FREE]
VLC is a free DVD player software and helps you to stream DVDs to Apple TV. What you need to do is play the DVD on your Mac and then enable AirPlay mirroring. Here’s the step by step guides.
First of all, please download and install the free DVD player VLC Media Player:
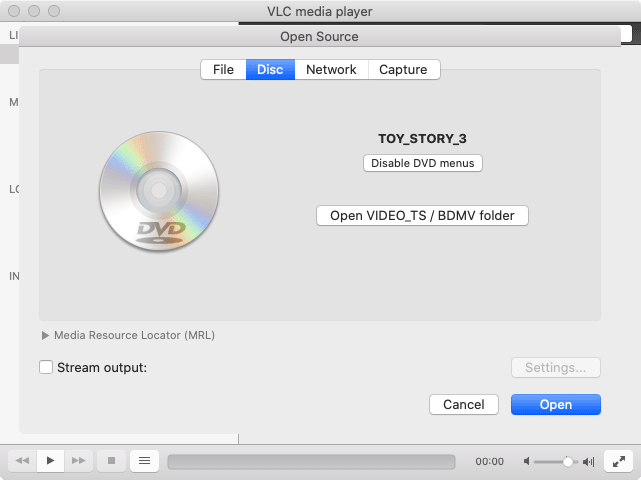
Then play the DVD in VLC. Go to “File > Open Disc…” in the VLC menu and click Open.
Once the DVD starts playing, enable AirPlay Mirroring in the menu bar. If you don’t see the airplay icon, go System Preference->Display and enable “Show mirroring options in the menu bar when available”. Here’s a YouTube video for you:
To be honest, it does not always work well, and I see people complains the streaming keeps dropping and video stuttering. If you have the same problem, I suggest you go for the below suggestions.
Rip DVD to Apple TV for Playback
We see it is easy to stream DVD to Apple TV for free, however, I am more concerned about protecting the DVDs themselves as they are fragile and easily get damaged by naughty kids. So, in my point of view, I’d always like to backup and rip DVD to Apple TV in the most compatible video format MP4. It’s also because MP4 can be easier for streaming to Apple TV via the TV.app.
Easy Solution to Rip DVD to Apple TV
Life is tough and we’d always like to rip DVDs with ease. There are a great many free ripping solutions like Handbrake and MakeMKV. However, when I try to rip Disney protected DVD to Apple TV. I am in trouble. Handbrake does not support encrypted DVDs at all and MakeMKV only supports DVD to MKV, which is NOT for Apple TV. Some of the paid DVD rippers do not satisfy me either. Some fail to load the protected DVD, some rip the DVD without sync.
Above all, DVDFab is an ideal solution for ripping DVDs to Apple TV 4K, Apple TV HD as well as any other video formats you want, including basic video formats MP4, AVI, MOV, and WMV and various phones, tablets, and TVs. HD videos like MTS/M2TS, MKV is also no problem. The newly released Enlarger AI helps you to upscale DVD to 1080P with better video quality.
And, with a powerful coding and encoding tech in, it rips Disney as well as Pixar protected DVDs with ease.
You can have a trial of DVDFab DVD Ripper through the above buttons. Please note what you download will be DVDFab, and the DVD Ripper is one of its functional modules. From my tests, the program is fully compatible with the latest OS Windows 10 and macOS Big Sur and the M1 MACs!
Apple TV 4K/HD Supported Video and Audio
According to Apple, Apple TV 4K and Apple TV HD support the below audio and video formats.
Apple TV 4K Supported Video and Audio:

Apple TV HD Supported Video and Audio:

Please note, for MPEG4 video, the video solution only goes up to 640*480. And, Apple TV HD only supports videos that are lower than 1080P. Apple TV 4K can play 4K videos.
How to Rip DVD to Apple TV for Streaming
Ripping DVDs with DVDFab is omnipotent and it is so easy to find your expected profiles. If not, you are always free to create one yourself. Ripping protected DVDs is as easy as ripping other homemade or non-encrypted DVDs with this Apple TV DVD Ripper. I am gonna show you how to use DVDFab DVD Ripper and will take the Apple TV 4K as an example. Although the screenshots are taken on Windows, this guide applies to both the Windows and macOS.
Firstly, insert your DVD into your computer’s DVD/Blu-ray drive. Download, install and launch DVDFab.
Step 1. Load DVD
DVDFab will automatically load your DVD in the DVD drive. If not, go for the Ripper module on top and drag and drop the DVD to the program for loading.
For the first time you use DVDFab for DVD ripping, you will be presented the below window to choose the DVD region. Feel free to disable it as DVDFab can detect the right DVD region for you. And, you can enable it in Settings.

Then, the program will start analyzing the DVD, which usually only takes seconds.
Step 2. Apple TV 4K Profile for DVD Ripping
After the DVD is loaded, go below to choose a profile for Apple TV. All Apple profiles are in Device-Apple.

[Optional]Step 3. Other Titles for Apple TV Ripping
After loading, you will see the program has already selected the right title for you. Generally, I recommend only the main title to rip movie DVDs to whatever videos. But for TV shows, you may have to click “Choose Other Titles” to choose other episodes.

[Optional]Step 4. Edit DVD Video.
Before you rip DVD to Apple TV, DVDFab can do some basic video editing like adding images, texts, or subtitles. You can also trim, crop the output video.

Step 5. Run Ripping
You are ready to run the ripping to Apple TV. Just click the Start button to do so and enjoy the perfect copy on Windows/Mac or Apple TV.
Watch DVD on Apple TV with 5.1 Surround Sound
Apple TV can definitely play 5.1 sound and there is no problem doing so when we stream videos from Netflix or within the Apple TV app. However, I have trouble to get iTunes or the TV.app to stream 5.1 surround sound over the ripped video from DVDs. With the help of robmathers on AskDifferent, I find it easy to watch DVD on Apple TV with 5.1 surround sound with the help of DVDFab. The key is that you will have to set two audio tracks in DVD ripping: AAC as the primary stereo track and AC3 pass-through as the secondary 5.1 track.
Firstly, you need to go to Advanced Settings here:

And, enable this option “Output both AAC and Ac3 5.1 audio tracks”, and leave the default audio track to AAC 2.0:

DVD to Apple TV Ripping Tips
- If you use the program to rip DVD to Apple TV on Big Sur, there are some tips for your attention.
- The output folder is in C:/ on Windows, the system drive. I recommend you set it to somewhere else, say the external hard drive, click the below folder icon to do so.
- The subtitle is disabled by default. If you want forced subtitles, this post helps. You can set default audio and subtitle track for future DVD to Apple TV ripping in Preference-Streams:

- I see the two new Apple TVs support 3D video streaming. You can even rip your 2D DVD to 3D MP4 for Apple TV as well. There is no 3D Apple TV profile, but you can create your own from 3D MP4 and save as your own. Go choose 3D.MP4 and custom the profile in Advanced Settings. Make sure the codec is H.264 if you set the resolution higher than 640*480.

Please, add an option to eject the movie/DVD tray whenever conversion is completed. It’ll be very helpful for people doing multiple discs, like me, who have to open it every time anyways. Plus, it’s very easy to tell when the conversion process is done when my screen goes off.
Sounds nice! I have reported this to DVDFab.