I like traveling and I’d always like to record almost every second of my day with my Canon digital camera and took over 10000 photos! But when I was trying to use the slideshow feature in a video converter to create photo slideshow from the folder of the whole pictures and had a single mp3 file as a musical background, I had trouble.
Following along with the FAQ page and the user guide, I was able to choose the images, choose the transition, set up the sorting, and select the music file. I clicked done and was taken back to the main screen, where my new slideshow project was shown, but when I clicked the RUN button, a window popped up that showed for a very short amount of time what looked like the slideshow being processed. Then the destination folder popped open, but there was no file in that folder. Going back and forth with their support team, I finally gave up. It seems this free photo slideshow maker does not support that large number of photos or pictures that are over 10000.
I switched to the below to programs. They are video and photo editors and I have successfully create a photo slideshow from over 10000 photos. In this post, I will share my experience of how to create photo slideshow even with large numbers of photos or pictures and you can add music, text or titles, effects and transitions to your slideshow to make it more professional. Also, check to learn how to burn photo slideshow to DVD.
Movavi Video Editor Plus
Movavi Video Editor is a powerful and easy-to-use video editing program for PC and Mac. It can cut and join video clips without degrading quality, apply unique video effects and filters, add music, titles, and more! Despite its wide range of functions, this video editing software is very simple to use: with a little imagination and some free time, you can get Hollywood-like videos with much less work. For photo slideshow making, it is just a piece of cake! Download the program and check the guide below.
Step 1. Add Photos
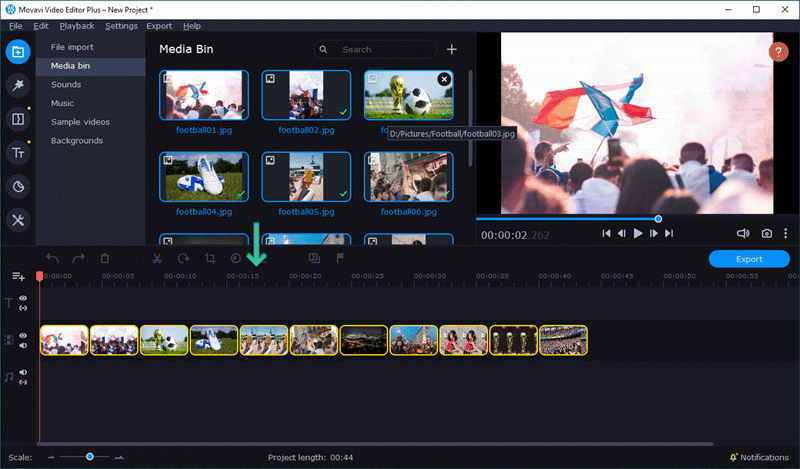
Opening Movavi Video Editor, you will see a clean new project window. Here, you can click Add files button to add your photos or pictures, as well as videos, to make them as a slideshow. Click its drop-down menu to add a folder.

All the newly added photos, pictures, or videos are selected by default. You need to drag them to the timeline.
Step 2. Add Music, Text/Titles, Effects and Transitions [Optional]
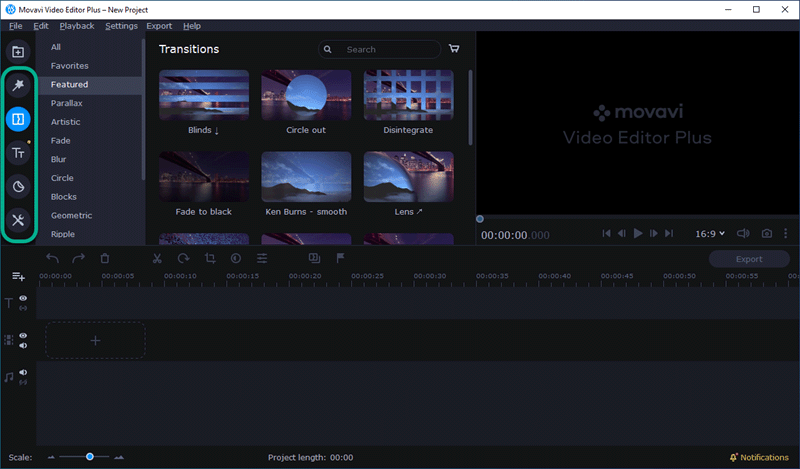
Movavi Video Editor helps to create professional photo slideshow with music, texts, titles, effects, and transitions. Click the below icons to add what you prefer.
Please note, if you want to add your own music to the slideshow, you will need to import your music files first. Instead, you can also download the build-in music from MOVAVI.
And, for transitions, you can use the below option to add random ones or add your favorite transitions one by one just as you like.
Step 3. Export Photo Slideshow
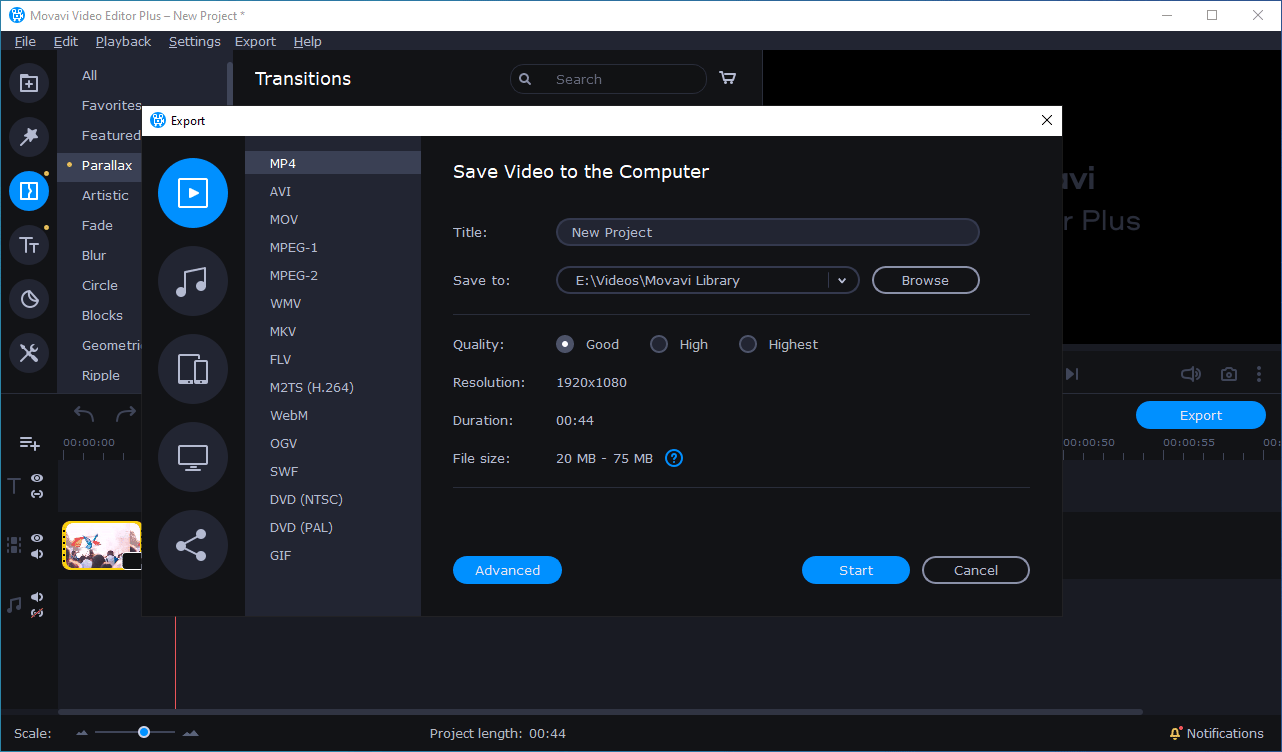
Is everything ready? Now, click the blue Export button to save your photo slideshow. As you can see, you can create photo slideshows with Movavi to almost any video formats. You can even upload directly to YouTube, Vimeo, or Google Drive if you are logged in within the program.
SmartSHOW 3D
SmartSHOW 3D is a user-friendly program for making videos using clips and photos. It is equipped with 700+ slideshow templates and artistic effects, 200+ built-in soundtracks, and handy slide editing tools. All this makes the process of making your slideshow quick and easy. With SmartSHOW 3D, professionals and amateurs can make their videos from scratch while newbies and busy people can create their movies using the Slideshow in 5 Minutes feature. If the program got you interested, hit the button below and try it for free, then follow the steps below to make your first slideshow in it.
Step 1. Choose a Predesigned Template
Have experience in making slideshows? Then go to New Project and design your movie from scratch. In case you are new to video making, go to Slideshow in 5 Minutes and pick a template that suits your occasion.

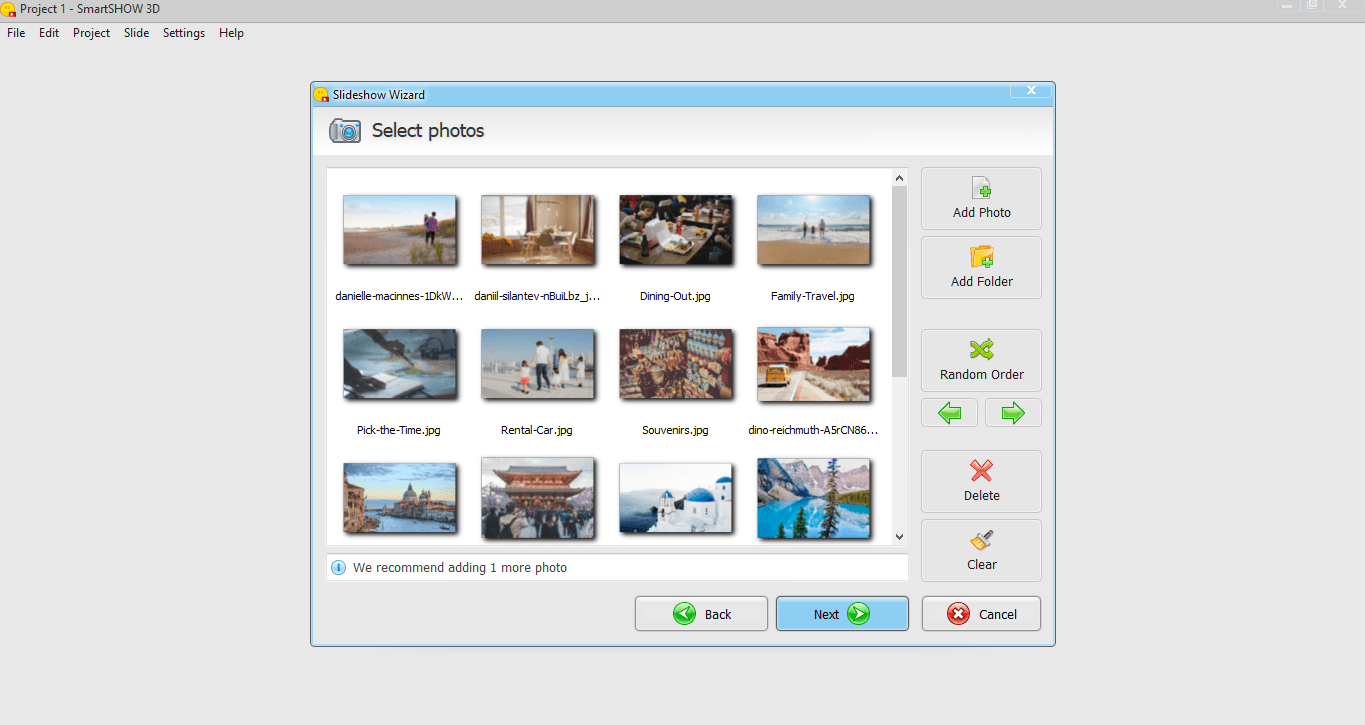
Step 2. Import Your Photographs
In SmartSHOW 3D, you can either open photos one by one or upload the whole folder at once. Do whichever is best for you and click Next.
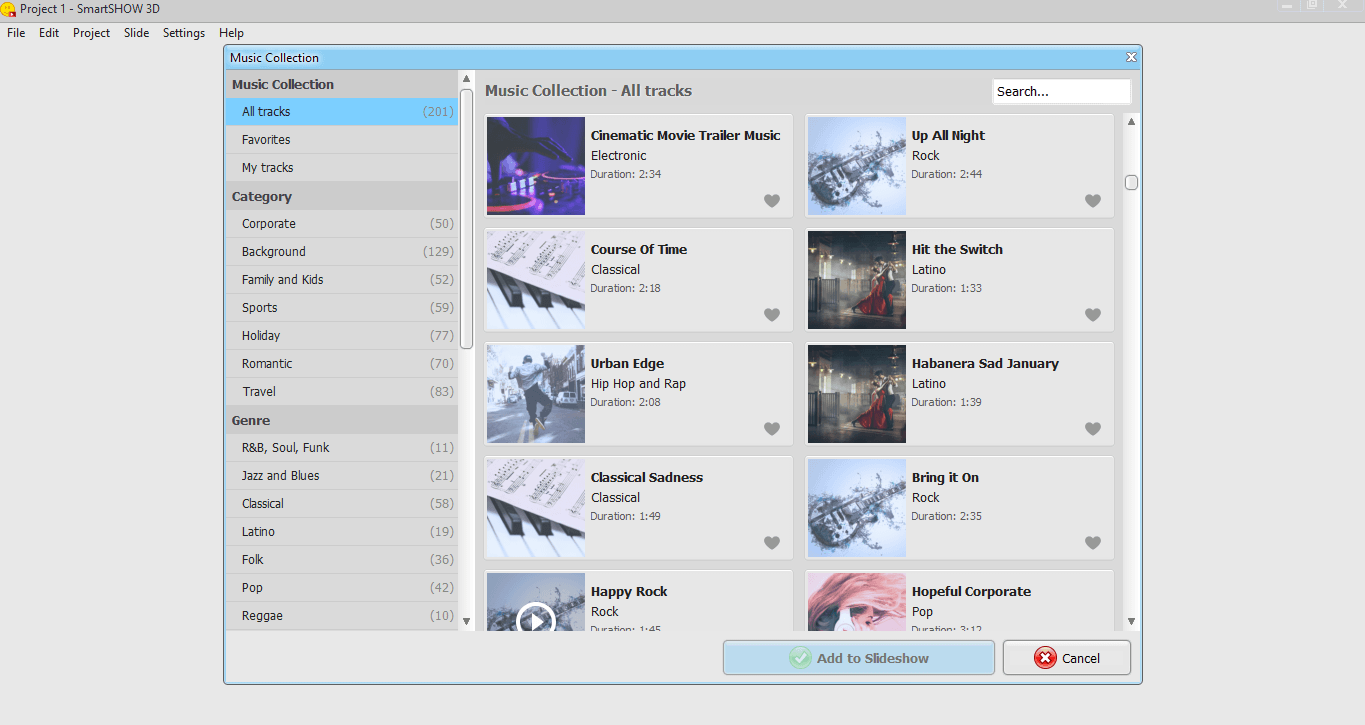
Step 3. Choose the Perfect Soundtrack
Feel free to use one of the 200+ soundtracks that the program has built-in. You will find music for any occasion. Otherwise, choose Add Music from File to import a song from your computer.
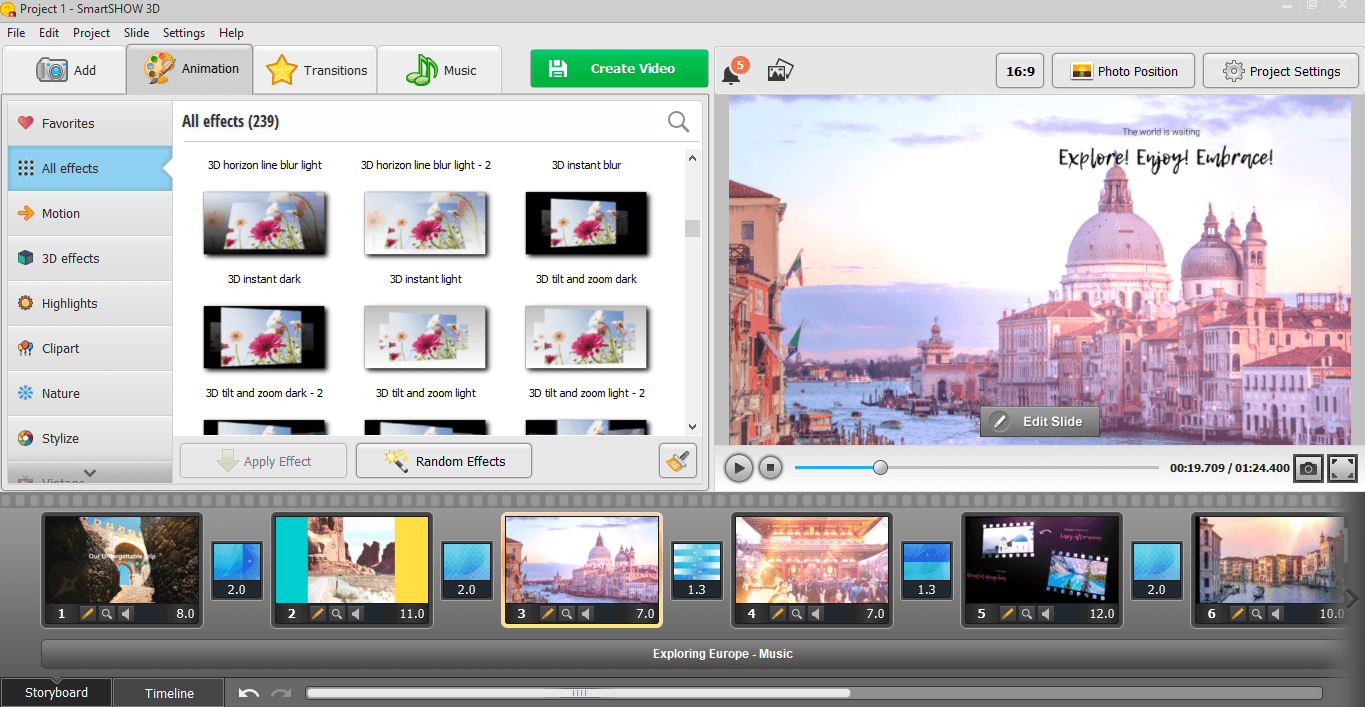
Step 4. Embellish Your Video with Art Effects
Want to take your slideshow to a whole new level? Add animation, transitions, and titles from the library of SmartSHOW 3D. Want to change something about your slide? Go to Edit Slide and set its duration, add new layers, change captions, adjust the volume of your music or voiceover, and more.
Step 5. Export Your Homemade Slideshow
Click Create Video and choose whether you want to export your slideshow as a video you can rewatch on your devices, as a DVD movie, or as a clip for the web. Save your slideshow in the format that works best for you and you’ll be set for sharing it with a friend or a family member.

Wondershare Filmora
It is a pity that Easy Mode is NOT available since Filmora 9 and we have to go for full feature mode to create photo slideshows. It is a bit more complicated but you have full control of every single photo like its position, brightness, 3D LUT, motion, etc.
Below is my brief introduction on how to use the full feature mode of Wondershare Filmora to make a photo slideshow. Just don’t worry, you are able to make a more professional slideshow with the full feature mode. And this guide also applies to the Windows version as well.
Step 1. Add Photos
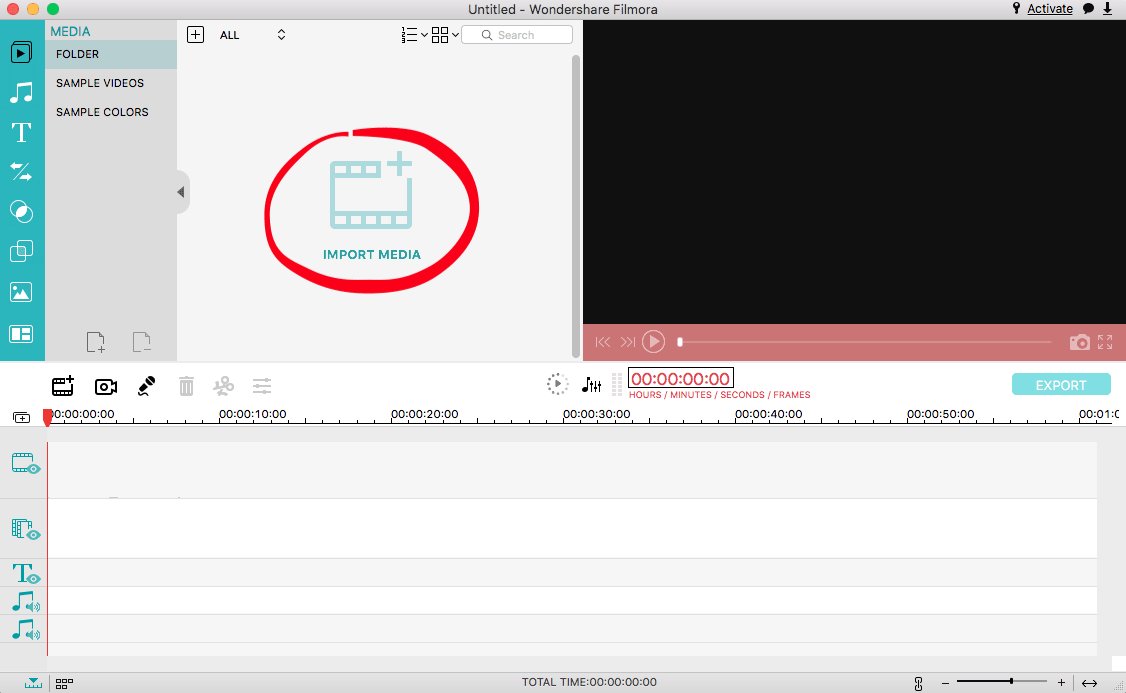
When Wondershare Filmora is launched, click IMPORT MEDIA to import your photos and pictures.
Command-A to select all photos and drag them to add to your project.

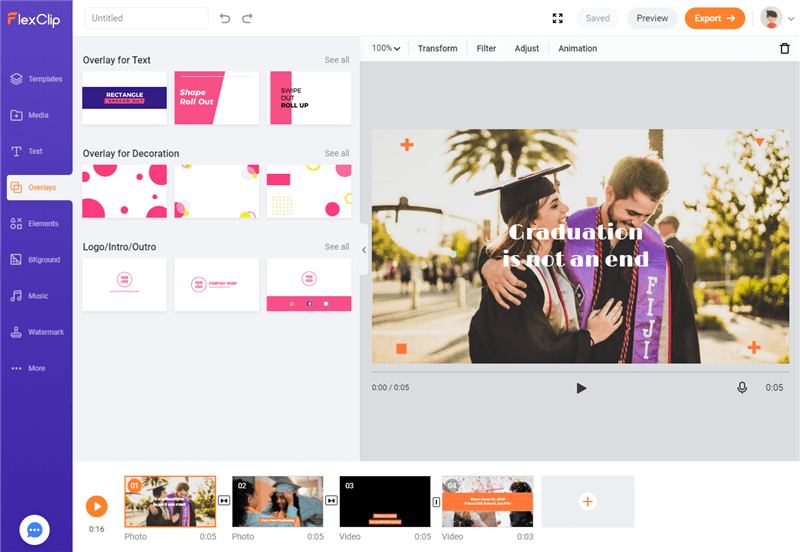
Step 3. Add Music/Text/Elements etc[Optional]
Click each corresponding button on the left to optionally add Music, Text/Credit, Transitions, Filters, Overlays, Elements to your photo slideshow. You can also split-screen.
Step 4. Export Photo Slideshow
Click the Export button to make your slideshow. You will have to create a Wondershare account for a free trial. Give it a name, set the resolution, format, frame rate, etc.

FlexClip Video Maker[Free Online Photo Slideshow Maker]
FlexClip Video Maker is a simple to use and cost-free video editing solution to create videos for business, slideshow, social media, education, weddings, and more. With a large number of templates, you can create your videos or photo slideshow in minutes, even if you are not very tech-savvy.
It may not have as many choices like the above offline programs, but it is far less expensive than most because it’s free. So, I believe it’s one of the best alternatives for creating a photo slideshow.
First of all, please visit the official site of FlexClip Video Maker and create a free account because we go ahead to create a photo slideshow online. After login, FlexClip will redirect you to its free online video editor.
Here, we can search a template or go directly to Slideshow, choose one you prefer, and move your mouse over and select Customize:

Now, unleash your creativity! You can any texts, overlays, elements, background images, or music to create your own photo slideshow!
Create Photo Slideshow with Filmora Easy Mode [Archived]
This part is archived for on old version of Filmora 8.
Creating photo slideshows from photos and pictures is simple with Filmora because of its built-in step-by-step design. As a video editor, Filmora actually does more and it is able to edit video! Or you can follow my guide below to create your own photo slideshows even with 10,000 images.
Please download a free trial copy of Wondershare Filmora for your PC or Mac. Install and launch it.
Step 1. Easy Mode
To create photo slideshow on Windows, we don’t have to go into FULL FEATURE MODE as EASY MODE is able to do what we need.

Step 2. Add Photos
There are a couple of ways to add your photos to a slideshow. Simply, you can drag and drop or add from the whole folder if have a lot of photos to create.
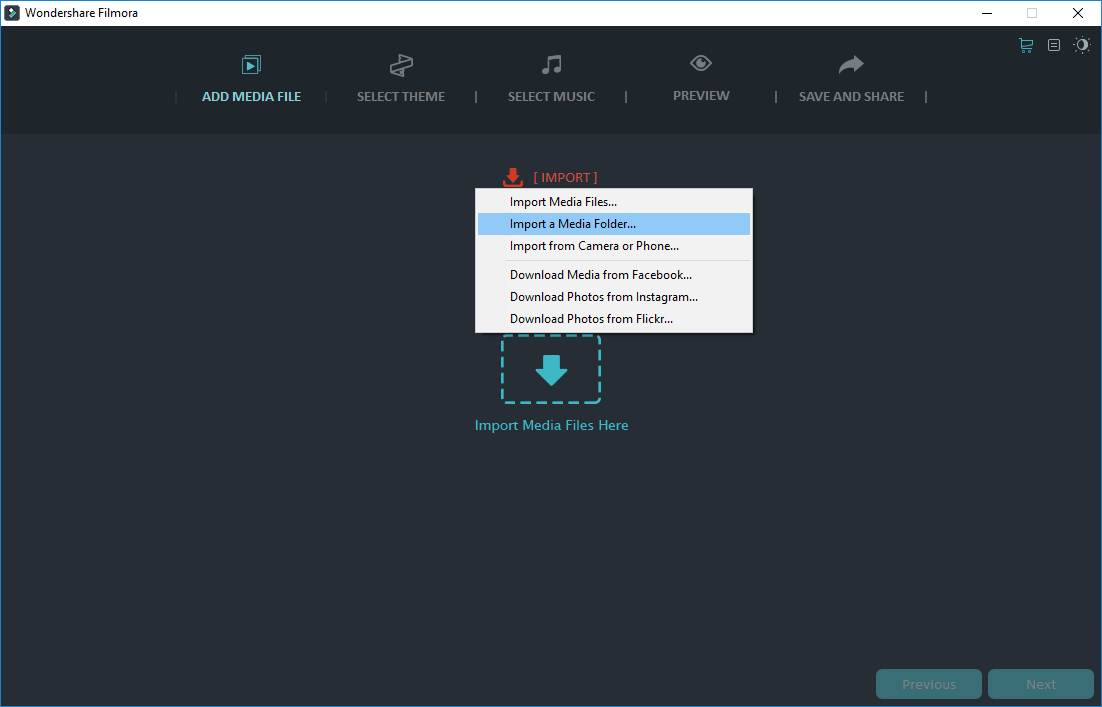
As is shown, you are also able to import your photos directly from your camera or iPhone/iPad as well as Android-based phones and tablets.
Step 3. Edit Photos[Optional]
All your photos can be loaded within seconds depending on how many photos you add. You will be displayed in the below window and here you can delete and rotate your photos.

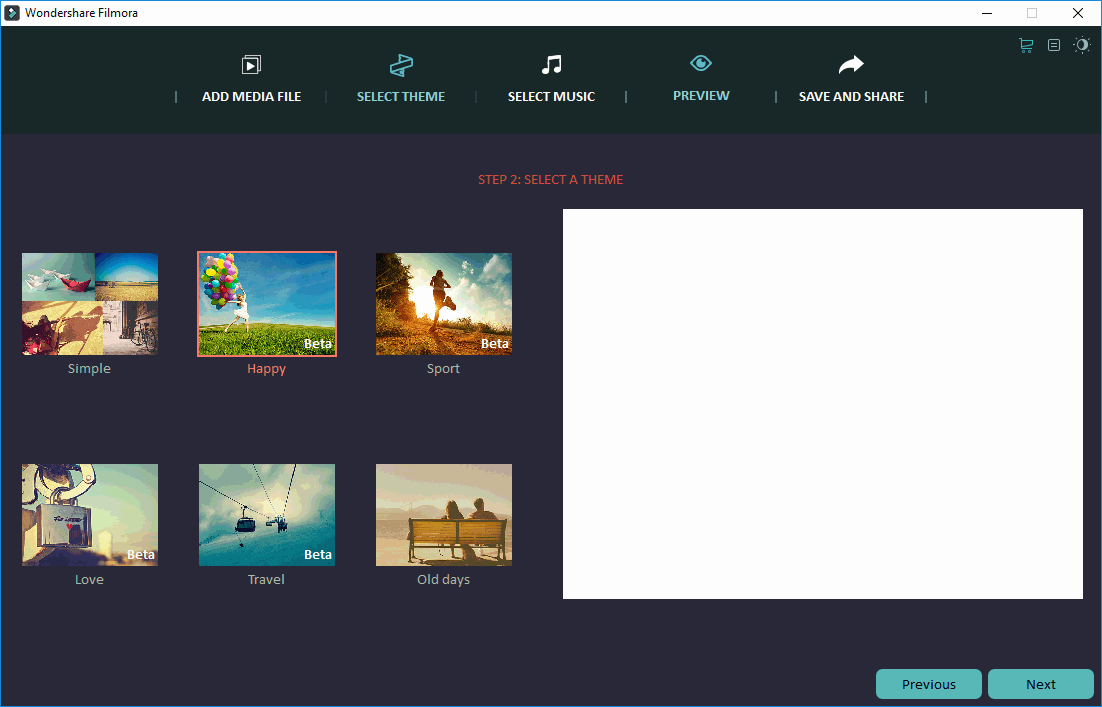
Step 4. Select Theme[Optional]
Wondershare builds in some free themes for your photo slideshow. Choose one or leave as it is.
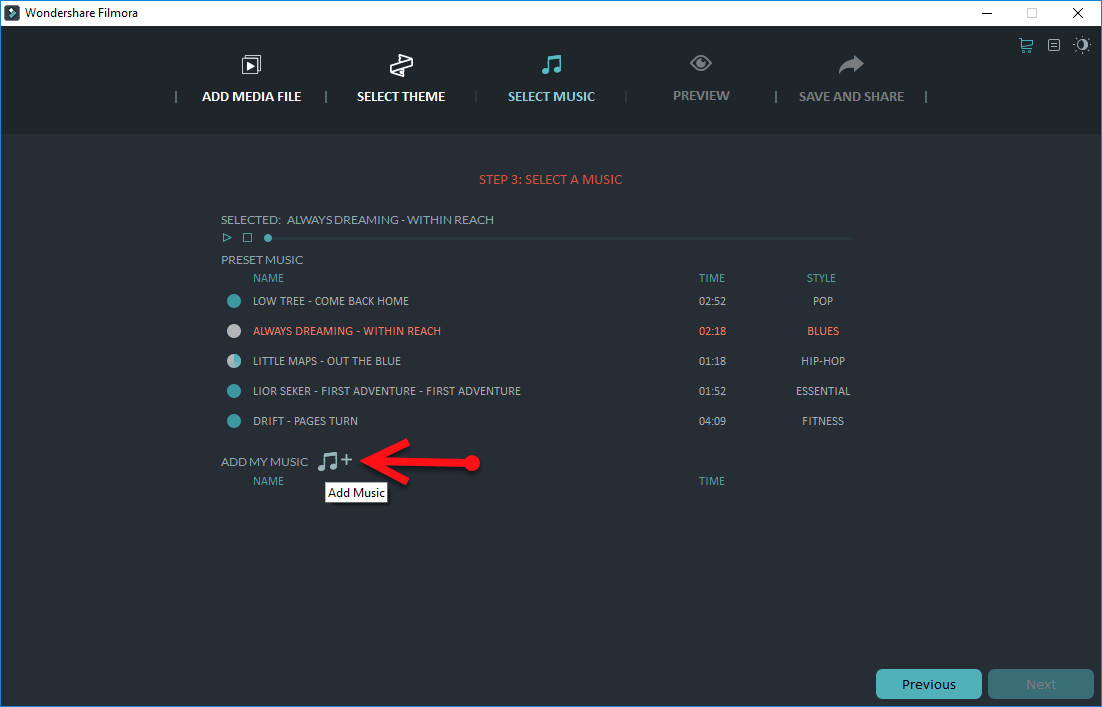
Step 5. Add Music[Optinal]
Wondershare builds in some wonderful music as well. You can choose one you prefer to your slideshow making. Or click the below button to add yours.
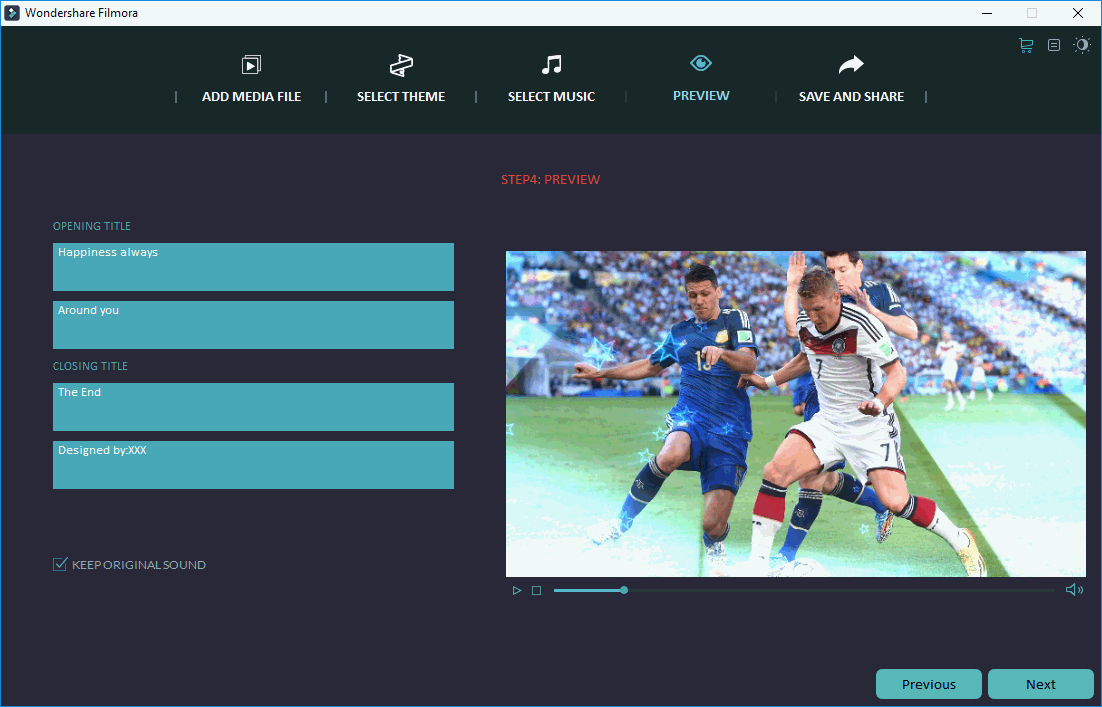
Step 6. Preview photo Slideshow
Here it is for you to preview your slideshow you make from photos and pitcures. Also, give it an opening title, closing title, and description as you need here.
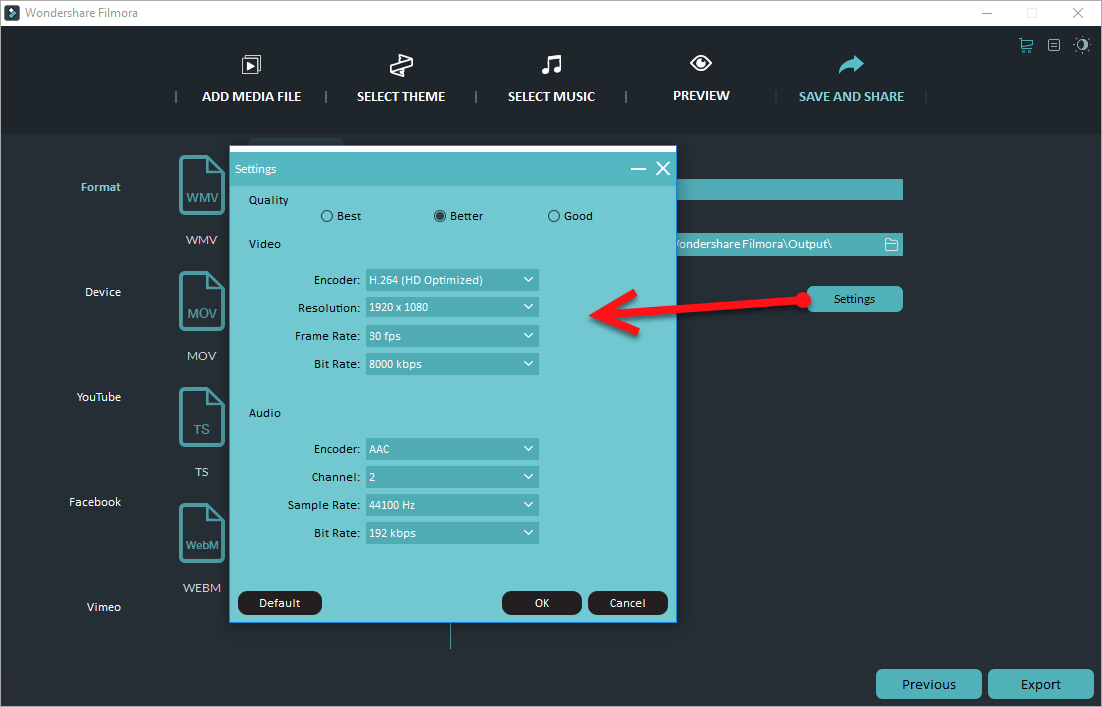
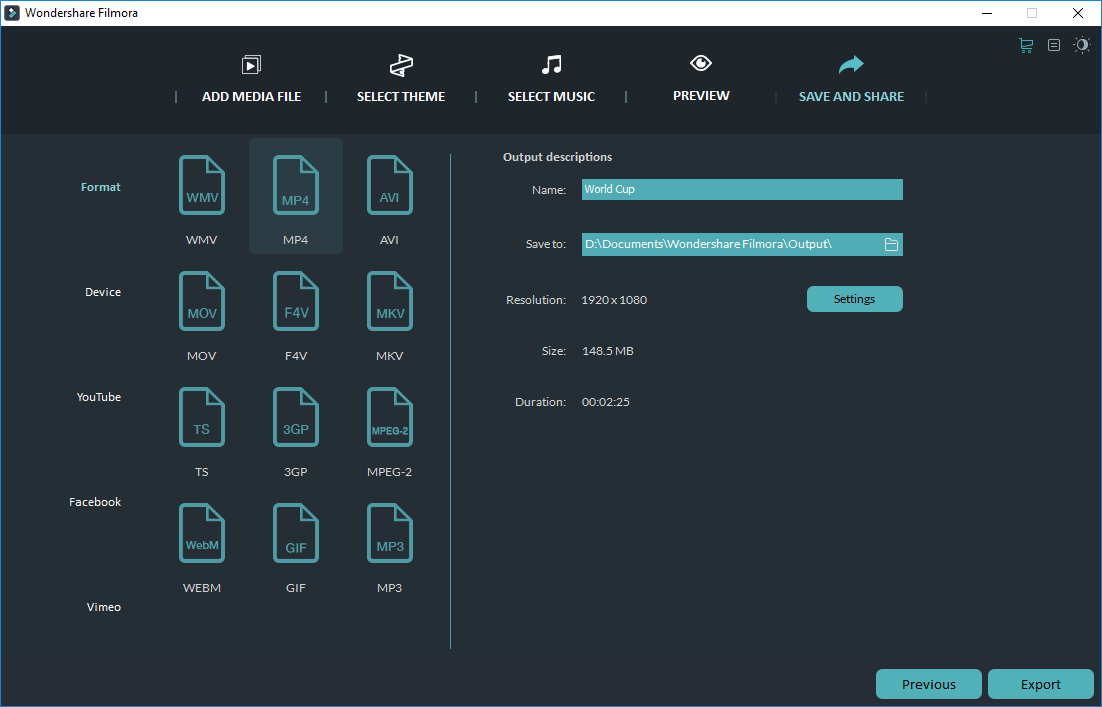
Step 7. Save Photo Slideshow
Create the slideshow and save it to a format or device you like. You can also create the photo slideshow for YouTube, Facebook, or Vimeo directly.
Tips:
You are able to set quality, resolution, codec, frame rate etc for your photo slideshow here: