There are many reasons that we have to run a virtual machine on our host. To be able to remove iTunes DRM on macOS High Sierra or newer macOS like Mojave and Catalina, I decide to create a virtual macOS Sierra on the current Mac so as to remove the DRM protection in M4V files purchased from iTunes or TV.app. I did a lot of Google search and found myself little luck on this topic. There are guides on how to run previous Mac OS X like Yosemite and El Capitan as the guest virtual OS, but I think it is a little outdated and the previous macOS installer is no longer available on Mac, so I decided to do it myself! Here’s how I create a virtual macOS Sierra in the current macOS.
Image already added
Download macOS Sierra
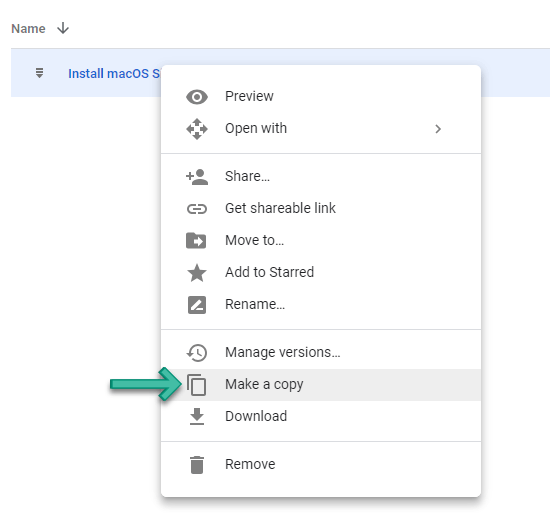
Before we get started, you will be required to download macOS Sierra. Don’t install it and leave it in the Applications folder. We will use it in in VM program. However, we are no longer able to download Sierra on Mojave or Catalina. I have uploaded a copy to Google Drive.
Please add the copy to your own Google Drive and Make a Copy to download:
Parallels Desktop
VMware Fusion and Parallels Desktop are NOT FREE but they do give us the most compatible way of running a VM Sierra on High Sierra host and Parallels Desktop offers a direct way to create, no codes needed, making it the easiest.
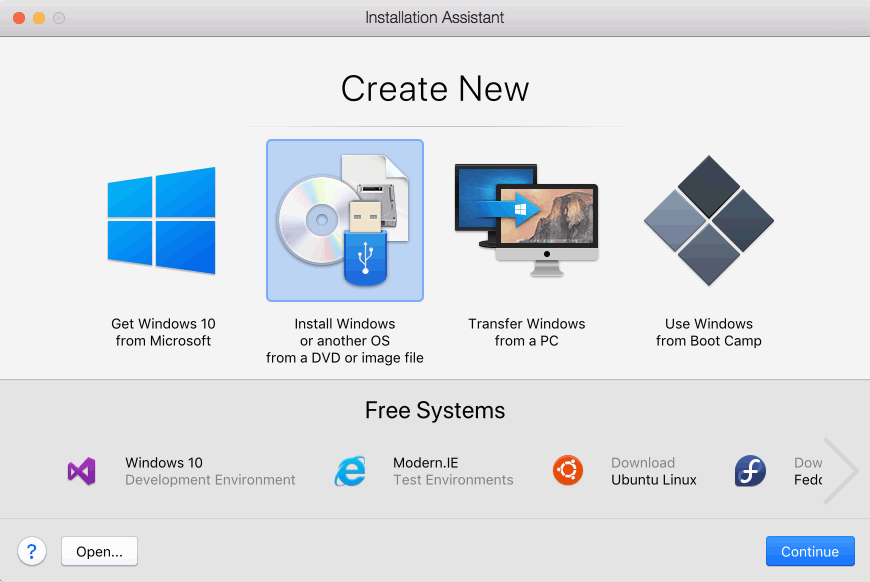
Parallels Desktop offers direct way to create a VM on your Mac. For the first time you start up the app, you are required to sign in and there comes the Installation Assistant of “Use Windows from BootCamp”. As we just don’t need it, we can click Skip to ignore. And below are the details on how to create and configure VM.
Click “Install Windows or another OS from a DVD or image file” and click Continue.
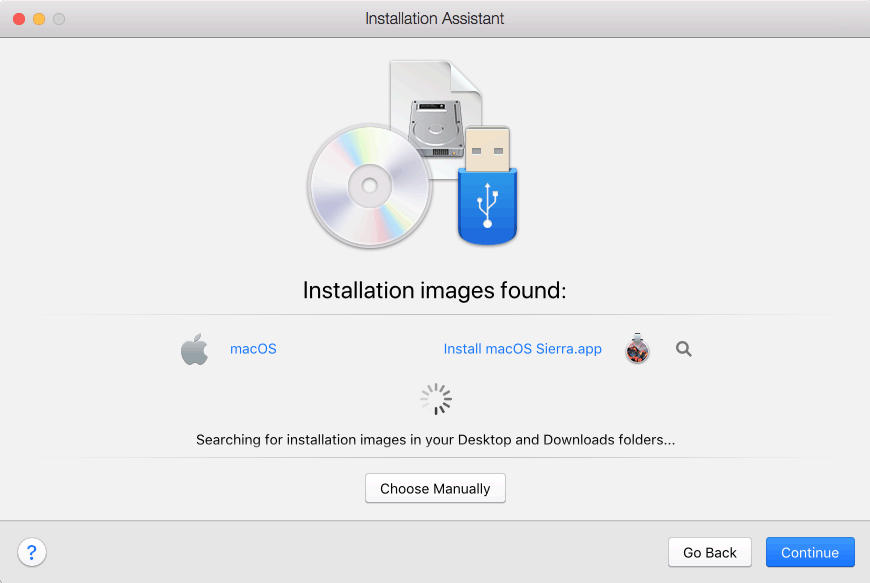
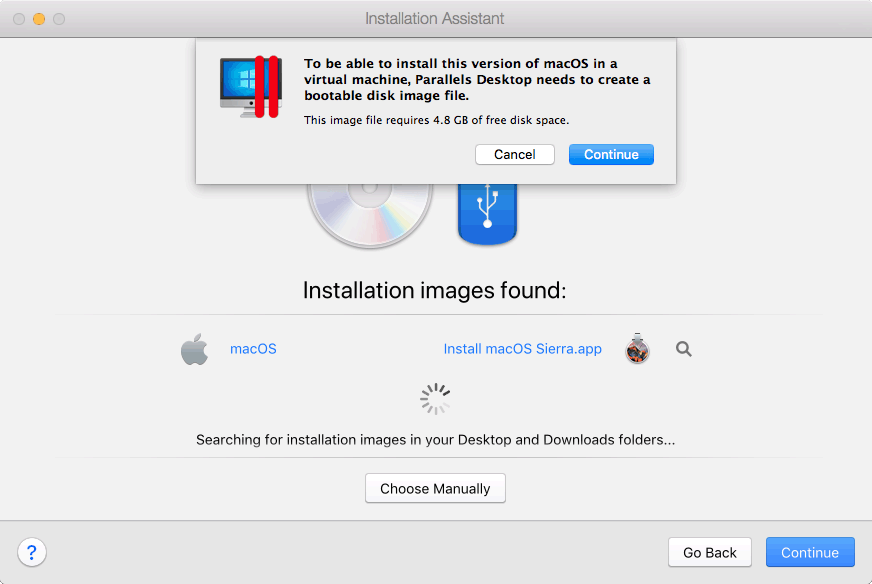
Parallels Desktop automatically scans the HDD and finds the satisfactory installation image. If not, you can click Choose Manually to locate yourself.
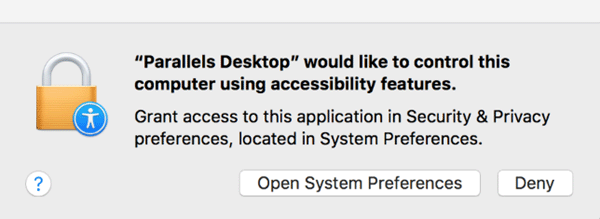
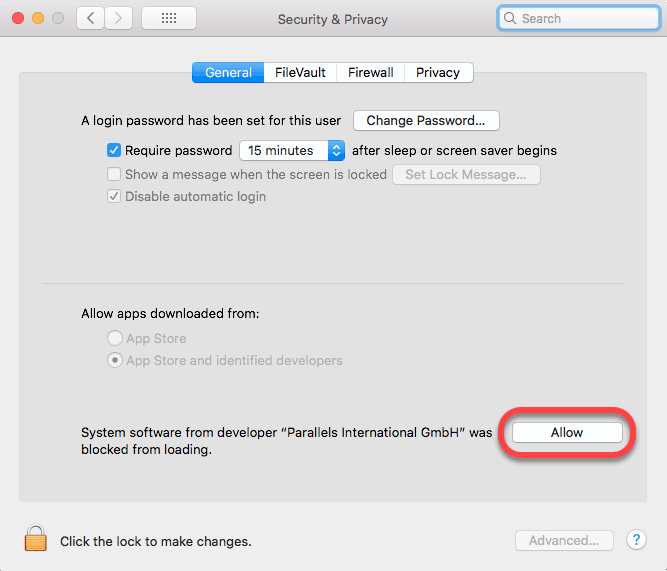
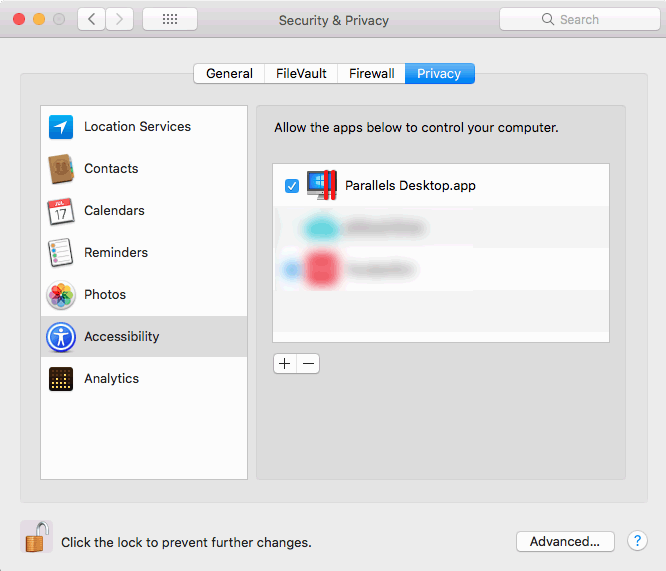
Importantly, if you are running the latest macOS Catalina, please allow Parallels Desktop control your Mac by clicking Open System Preferences and it will take you to Security & Privacy -> Privacy -> Accessibility.
And, you need to unlock to make changes and check Parallels Desktop.app:
Also, allow it to access the microphone and camera to make sure it is 100% working.
Then, Parallels Desktop will create a bootable DMG file for you. Click Continue to confirm.
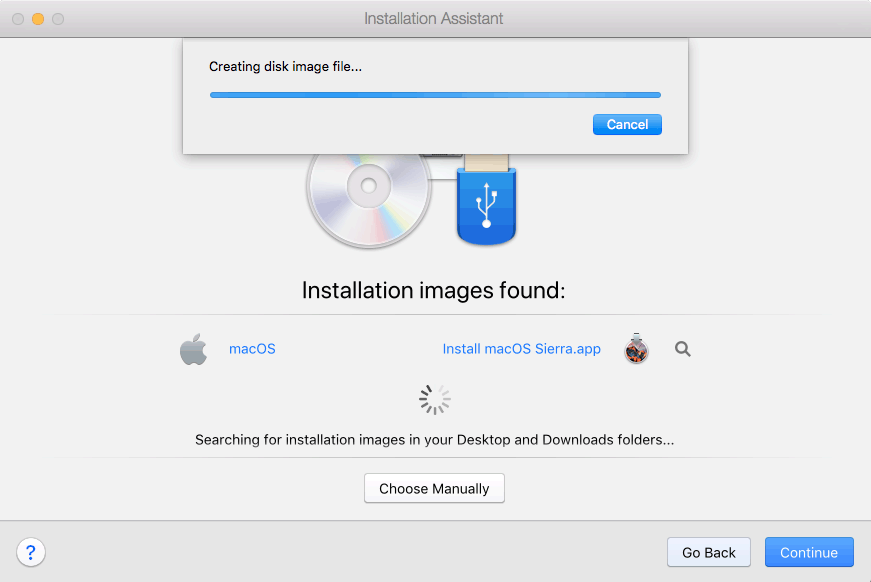
Save the bootable dmg file to somewhere you want it to. You can rename it as you like.
And, it converts the installer app to dmg automatically. I like this feature as other VM programs require you to create a bootable image either in DMG or ISO yourself. For VirtualBox, you may even have to enter a couple of commands to do so.
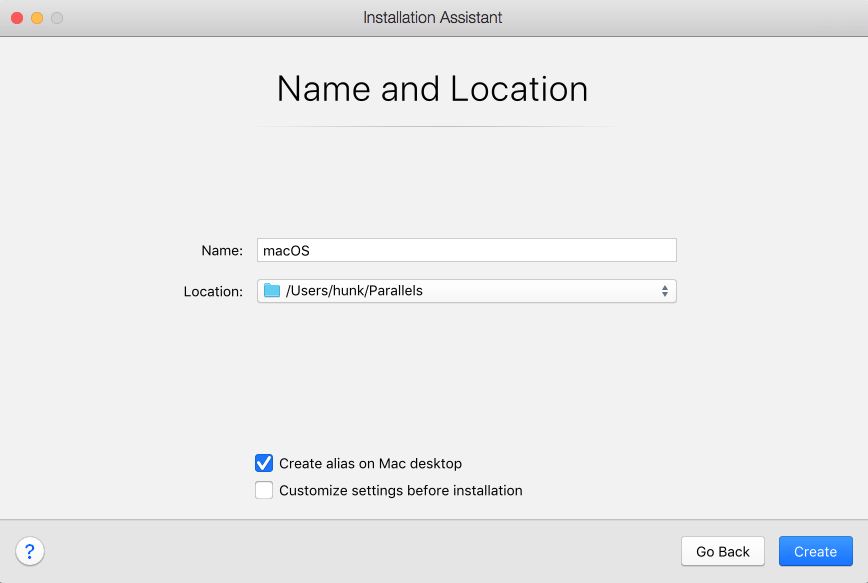
Creating a disk image won’t take you too long and it is even faster on a SSD. Then give your virtual Sierra a name and location.
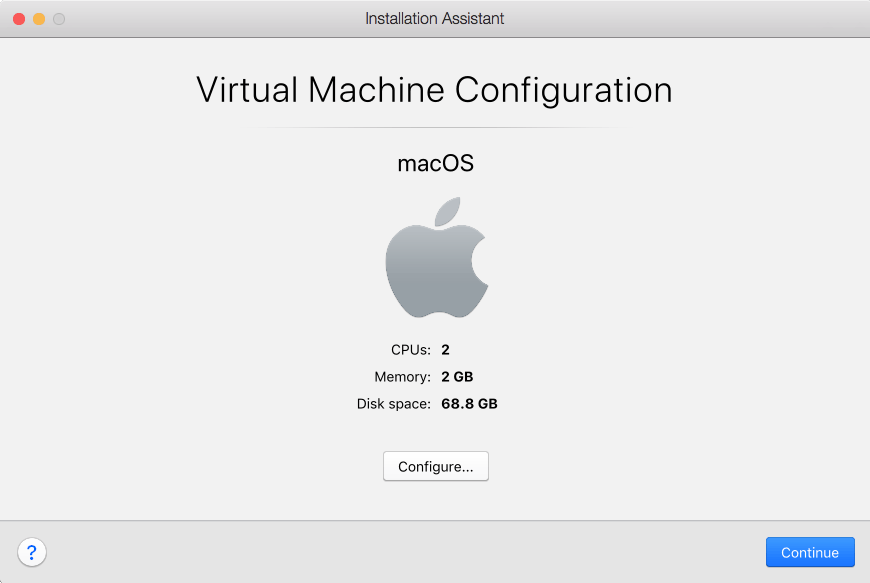
You can configoure your VM or leave the default. Click Continue to boot the VM.
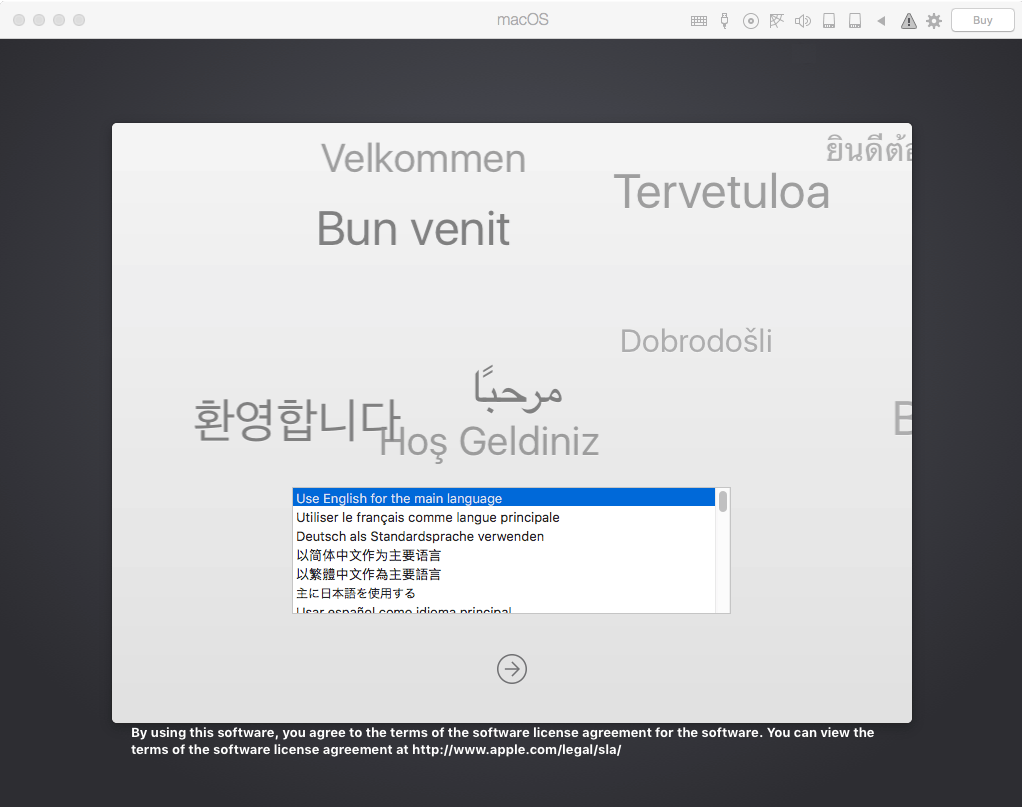
After booted, choose the language:
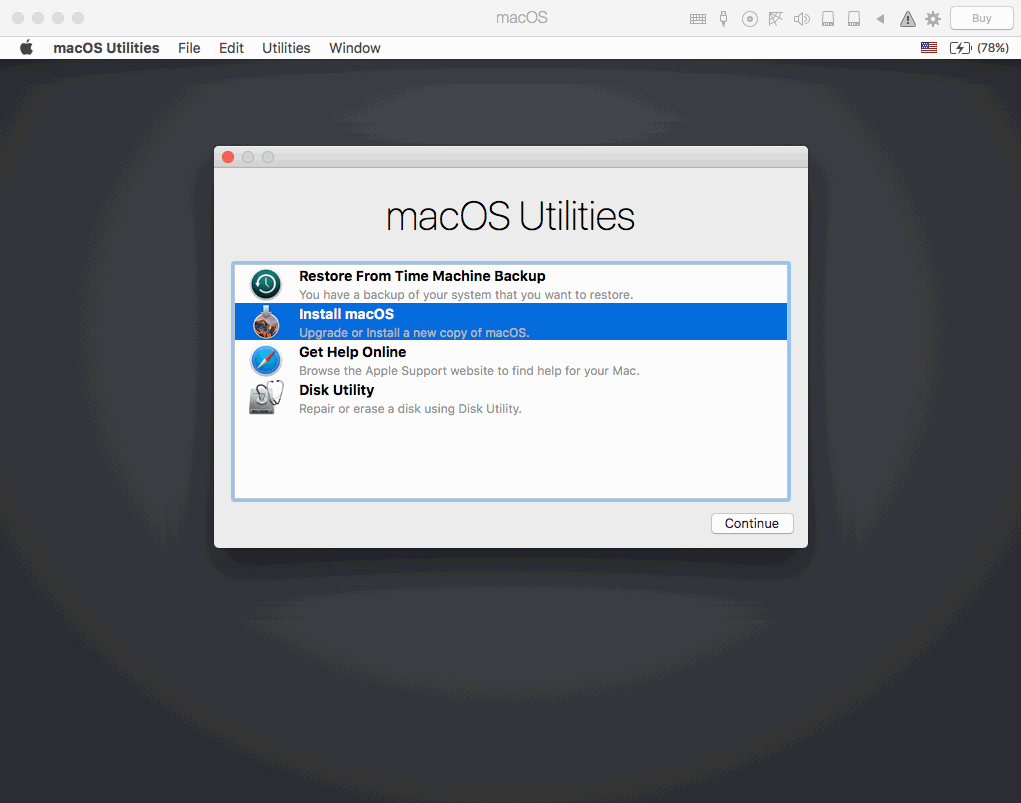
Unlick others, you are able to install the VM directly by clicking Install macOS without going to Disk Utility and format the virtual HDD.
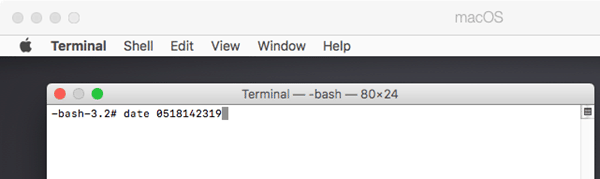
However, you would get the below error message when you try to install VM Sierra that reads: “This copy of the Install macOS Sierra application is damaged, and can’t be used to install macOS.”
OK, no worry! The installer is not corrupted, but you would get the error due to the incorrect date setting. And, here’s a simple fix for it. Go Utilities in the menu bar in the VM machine and open Terminal.
Then, you can go on and click Continue and agree with the terms and install the macOS Sierra on Macintosh HD.
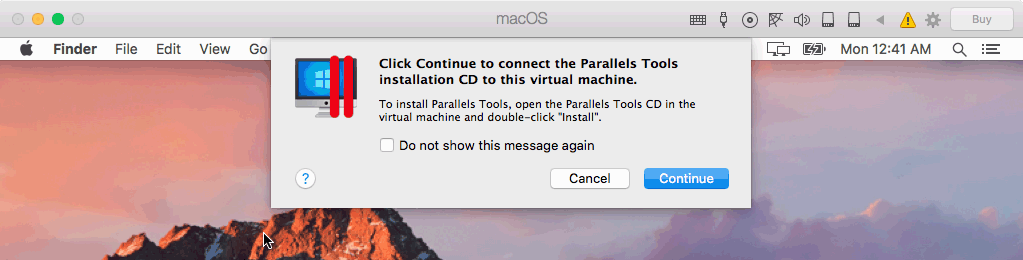
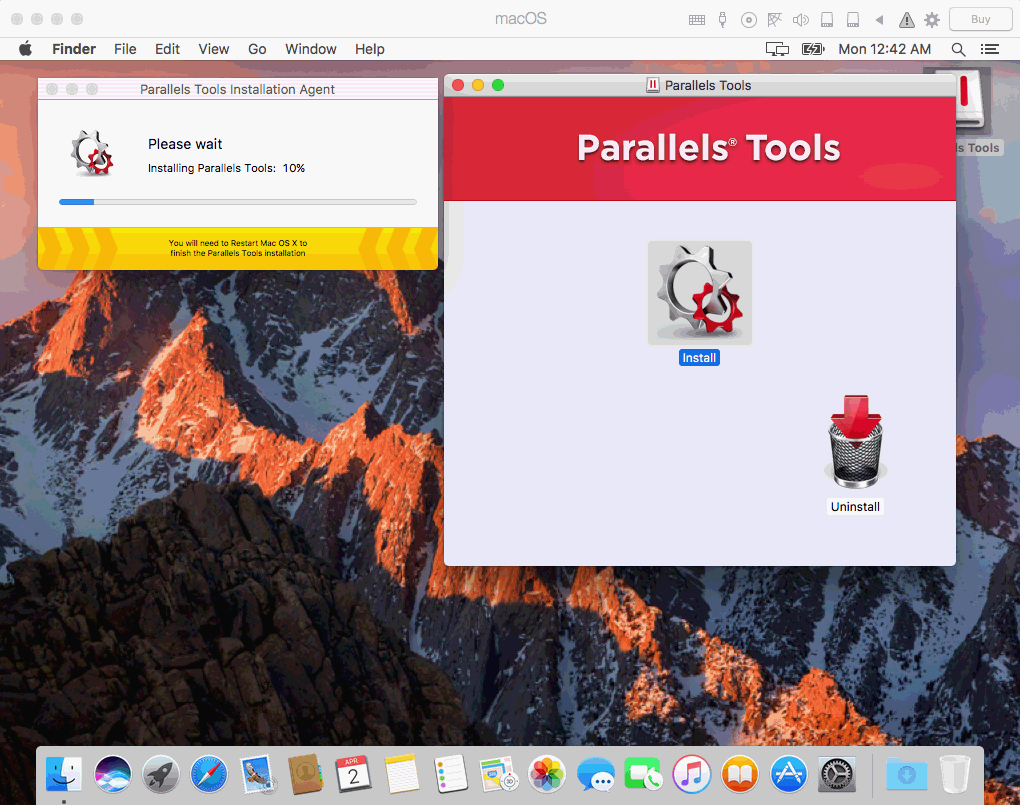
macOS Sierra VM will automatically restart and you will have to setup your VM like what you do on a real machine. After it is booted, go Actions-Install Parallels Tools in top menu bar.
Click the mounted image and click install to install the tools! After that, you will be required to reboot and after rebooting, you will see the VM runs more smoothly and shared folders are available!
Tips: be sure to allow “Parallels International GmbH” in Security & Privacy as well as Accessibility in Privacy.
Subscribe
13 Comments
NewestOldest
Phil Hawkshaw
7 years ago
Hi,
This is a really promising solution thanks for sharing it.
However since the move of OS updates to the System Settings app the download links for older OSs down seem to work. The link shows Sierra in the App Store but on clicking ‘Get’ it tries to open it in the OS update section of the Settings app and states it cannot be found and that the Mac is up to date.
Hi Phil,
Are you running Mojave? I tested it on Mojave and I have the same problem. I have the installer and if you don’t mind, I will upload it to the cloud and share with you guys.
Hunk.
unfortunately I’ve got the following info during the step “macOS Utilities / install macOS”:
“This version of the program is corrupt and cannot be used to install mac os”
Any idea? I´m using Mac OS Catalina 10.15.4 and Parallels Desktop Pro 15.1.4.
Please check the MD5 first.
You can go Applications folder->Utilitis, and open Terminal.app.
Then, type md5, hit the Space button, and drag the installer to the Terminal window, and hit Return. macOS will generate the MD5 for you. Check and see if it is 1d5ac8c4bce02beb3b441eca744f893b.
If not, the installer is corrupted, and you will need to re-download.
Hi Hunk,
Many thanks for your fast response. I’ve double ckecked the MD5 in the Terminal.app and the result was the same 1d5ac8c4bce02beb3b441eca744f893b.
Unfortunaltely I cant still install Mac OS Sierra (“This version of the program is corrupt and cannot be used to install mac os”).
Do you have any other ideas?


Hi,
This is a really promising solution thanks for sharing it.
However since the move of OS updates to the System Settings app the download links for older OSs down seem to work. The link shows Sierra in the App Store but on clicking ‘Get’ it tries to open it in the OS update section of the Settings app and states it cannot be found and that the Mac is up to date.
Hi Phil,
Are you running Mojave? I tested it on Mojave and I have the same problem. I have the installer and if you don’t mind, I will upload it to the cloud and share with you guys.
Hunk.
Hi Phil,
I have uploaded to Google Drive:
https://drive.google.com/file/d/1KhLmQAONfAl0JG-2YQqhAaNGMYHTe0Up/view?usp=sharing
Please add it to your own Google Drive and Make a Copy to download.
Hi Hunk,
unfortunately I’ve got the following info during the step “macOS Utilities / install macOS”:
“This version of the program is corrupt and cannot be used to install mac os”
Any idea? I´m using Mac OS Catalina 10.15.4 and Parallels Desktop Pro 15.1.4.
Many thanks in advance.
crzyG
Hi crzyG,
Please check the MD5 first.
You can go Applications folder->Utilitis, and open Terminal.app.
Then, type md5, hit the Space button, and drag the installer to the Terminal window, and hit Return. macOS will generate the MD5 for you. Check and see if it is 1d5ac8c4bce02beb3b441eca744f893b.
If not, the installer is corrupted, and you will need to re-download.
Hunk
Hi Hunk,
Many thanks for your fast response. I’ve double ckecked the MD5 in the Terminal.app and the result was the same 1d5ac8c4bce02beb3b441eca744f893b.
Unfortunaltely I cant still install Mac OS Sierra (“This version of the program is corrupt and cannot be used to install mac os”).
Do you have any other ideas?
Best
crzyG