There have always been plugins and software to image noise reduction, like Noiseware and Photo ninja. However, since AI tools have been around, I can no longer recommend them. Modern software can effectively remove or at least significantly reduce image noise from photos. In this Topaz Denoise AI Review, you will see the best tool to do this.
Denoise Images on PC, Mac, Photoshop
Topaz Denoise AI works as a plugin for Photoshop and a standalone program for PC and Mac.
You can call the Topaz Denoise AI plugin from Photoshop or Lightroom Classic, as shown below. Working as a plugin, you can continue directly with the raw development after denoising.
Topaz Denoise AI also works as standalone software for PC and Mac. It supports PNG, JPEG, as well as RAW files too. In this review, I mainly talk about the standalone version.
5 AI Models and Auto Model Selection
Topaz DeNoise AI lets you choose between 5 different AI models. To get the best results, you can compare them and pick the one that works best for your photo.
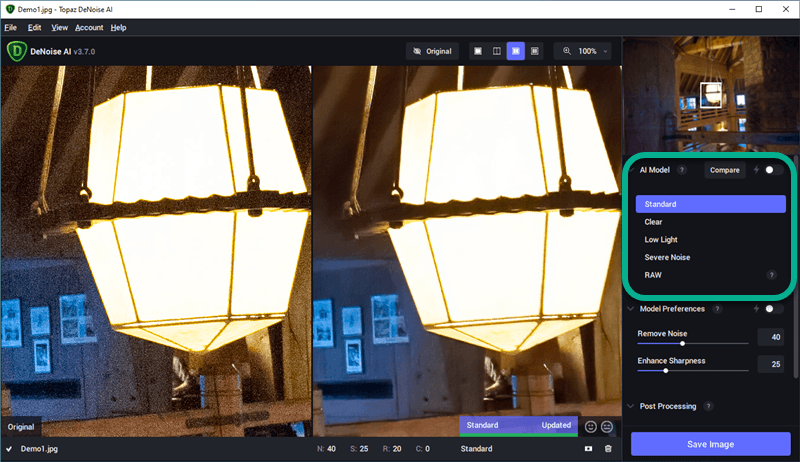
- Standard: The default AI model for most cases.
- Clear: Ideal for water, skin, petals, as well as other subjects with smooth surfaces
- Low Light: As its name suggests, the Low Light mode works particularly well with photographs taken in dim light.
- Severe Noise: AI Denoise images with high ISOs.
- RAW—Especially and effectively designed for RAW files.
Besides, Topaz can auto-select an AI model for you to denoise images. However, during my Topaz Denoise AI review, I found the auto-selection is actually not very smart. It seems always to select the Standard, while I think Low Light is better for denoising this image.
Denoise images with Topaz DeNoise AI
It’s super-easy to do AI image noise removal with Topaz DeNoise AI than we do with Photoshop years ago. It has a clean and straightforward UI. In this part of the Topaz Denoise AI review, I will walk you through how to denoise images with Topaz.
Please click the below button to download, install and launch Topaz Denoise AI.
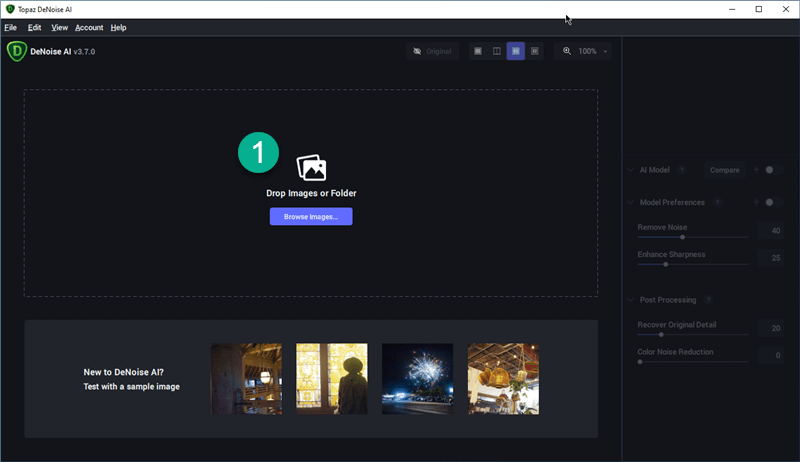
Step 1. Load Images
In order to proceed, you will first need to import your image. Click Browse Images or drag and drop your photos, images or pictures. You can add a Folder for batch denoising.
Step 2. Choose an AI model
Choose a proper AI model according to your images. You can also use the Auto function. But I don’t think it is brilliant and accurate. If you find it really hard to pick up the right AI model, I’d rather suggest you use the Standard model.
Step 3: Model Preference
Here I’d rather enable “Automatically detect recommended settings for this image” for Model Preferences.

Step 4: Post Processing
Post Processing is designed to give you additional control over color noises. I always keep the default settings for Post Processing.
Step 5. Save Images
Click the Save Image button in the lower right corner to start AI noise denoising.
How Does It Work?
As far as I can see, Topaz does a great job in image noise removal. And, in my opinion, it is the best AI image denoisers so far in the world. Check the image below or use your own to see how it works for you.

Pricing
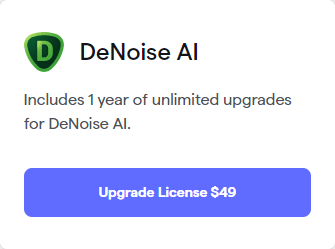
Topaz Denoise AI is sold at $79.99. It’s a perpetual license, however, it only allows one-year free updates. To add another year of unlimited upgrades for DeNoise AI, you will need $49.

Actually, if you also want to sharpen and upscale images, the Topaz Image Quality bundle, which includes Topaz Denoise AI, Sharpen AI, and Gigapixel AI, are more commended. It costs $199.99 and $99 for the upgrade plan.
Do you also want to Sharpen and Upscale Images
Topazlabs provides the best image editing solution with cutting-edge AI technology. Topazlabs hires various experts to develop its own AI algorithms and make its programs learn precisely how to improve images AND videos. In this Topaz Denoise AI review, I’d also like to check out the below Topaz programs as I believe you may probably also need to sharpen and upscale images.

Sharpen AI: As the name suggests, it is a piece of photo editing software that sharpens photos and recovers out-of-focus and motion blur. Sharpen AI figures out how to improve the motif in places where the focus isn’t proper, where there is blur or shaking, or where there is motion blur. Sharpen AI chooses the best way to sharpen by default, but the user can also take control and change different parameters.
Gigapixel AI: The best way to describe Gigapixel AI is with a word from consumer electronics: “upscaling.” The algorithms figure out what “photorealistic” means by looking at many different pictures. Images are changed to look like they were taken with a camera with a much higher resolution.
Pros and Cons
During my review of Topaz Denoise AI, I find there are more pros than cons. You can check them here:
PROs
- Excellent quality with detail preserved
- World-class AI algorithm for image noise removal
- 5 AI Models to denoise different kinds of images, photos, or pictures
- Automatically detect the suitable model for denoising
- Uncompressed or RAW photos supported
- Auto Model Preferences
CONs
- Yearly subscription
Conclusion
Before I wrote this review, I had used Topaz Denoise AI for a few months. I think it’s the best tool for removing noise in photos because it gives the best results and doesn’t cost too much. Denoising an image using DeNoise AI can be a time-consuming procedure because of the many setting options available and the inconsistency of the outcomes with raws and photographs that have previously been edited. But I’ve always thought it was worth it so far. Yes, I bought the whole Topaz bundle because I liked the software, along with Sharpen AI and Gigapixel AI.